Another versatile greeting on a non-gender specific card. Could be used for get well, thinking of you or birthday. I used one line of atg adhesive to stick the strips to my Creative Memories cutting mat. Then I used the CM circle cutter to cut the circles out of the strips. I cut circles from the plain paper and trimmed slightly to make "buttons" that would fit inside the spaces. My 1/16" served as button holes. Hemp twine around the project added a bit of a rustic touch and some texture.
Showing posts with label for encouragement. Show all posts
Showing posts with label for encouragement. Show all posts
Thursday, July 31, 2014
Black and Cream on Kraft
This card was so fun and easy, I made six. I felt like it could fit a variety of occasions. Sympathy, Get Well, Birthday, Thinking of You, etc.
Friday, July 25, 2014
Ombre Butterflies
This card was made at the request of my daughter, who was attending a personal bridal shower for her friend. I had paint chips at my disposal from having painted the girl's bedrooms over Spring Break. I made two cards, not sure what greeting my daughter preferred. And I used the colors from every other sample, therefore one card has darker has a darker feel to it. I used a small amount of glue down the center of each butterfly so the wings could "lift up" a bit.
Hemp cord from Darice, weight #10. Butterfly punch by Martha Stewart. Pearls from Hobby Lobby.
Thursday, July 17, 2014
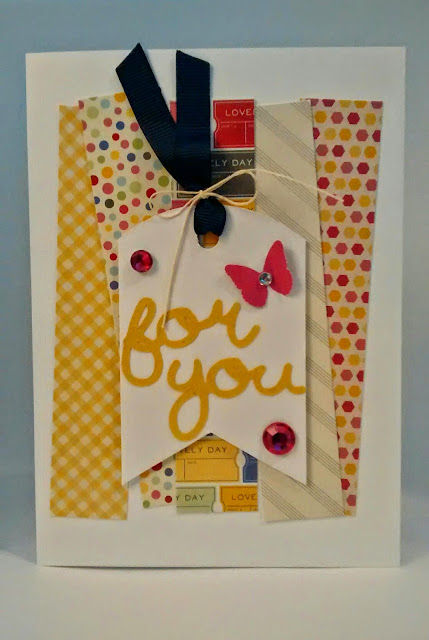
Bright and Cheery
I purchased two paper pads that sat on my desk for a very long time. I still don't feel like I've used them to their maximum potential. But I loved the cheery colors and the designs on the paper. Since I didn't have a specific occassion in mind to make these cards for, I decided the "for you" greeting would work on the front and then I could make it fit the occasion when I use them and add my inside sentiment. It could be "for you...to cheer you", "for you...on your birthday", "for you...just because", "for you...to get well", etc. It was a also a win because it utilized the remaining titles I cut and didn't use from my friend's special card (see previous post). Oh, and by the way, I forgot to mention in that previous post that I actually cut two sets of paper for that card because I wasn't sure which direction I wanted to pursue. So, that's why the middle photo below looks oddly familiar (but notice I didn't handstitch on it...another test run using paper piercing which I didn't like nearly as much as stitching).
Back to this post...the cards with the tags below show a really neat way to use a short scrap of ribbon when there isn't quite enough to tie. And I like to bump the ribbon up to show depth, so I use a small glue dot to hold the ribbon in place.
Tuesday, April 8, 2014
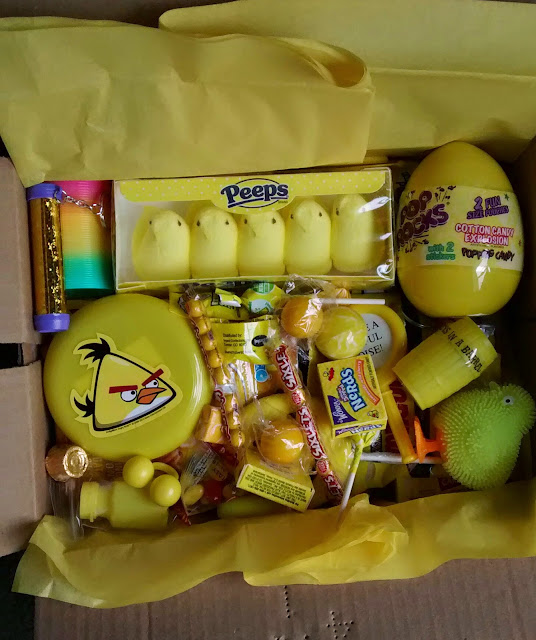
Box of Sunshine
I found the idea on Pinterest to send a box chock full of yellow items to someone who was sick or in need of a pick me up. And seriously, if that doesn't cheer you just thinking about it, there's something wrong!
So my girls and I went on a treasure hunt. We got most of our stuff at Party City. That store is awesome for something like this because you don't have to buy a whole package of one item...you can buy just a few pieces of a variety of things. Besides, they have super cool little party favors =)
And of course, a sunshiny package requires a sunshiny card...
Tuesday, August 13, 2013
Controlling the Scrap - Version 1.2
Last (for now) but not least is another card lift that I liked b/c it not only used scraps but it also had the ability to show off some of the busy papers that I tend not to use from my 6x6 pads. Their print is usually too busy or large to see the detail when I add all the other layers. With the large mat and no competing image or die cut, you can see it well in this sketch.
These took a little more planning for two reasons. #1 I don't have a variety of colored stamp pads-which would have made the sentiment less time consuming. Instead I pulled out my Spectrum Noir markers and used those to coordinate the sentiment. #2 I had to do a few trial and error cuts from my Cricut for the label. It probably doesn't help that I'm a bit picky and refuse to just go with the first one that fits =) Even then I put these five cards together fairly quickly.
You will notice a little extra detail on the floral patterned cards below. I felt that the sentiment I had stamped for the others was a little too mod so I went with a scripty sentiment on these. It looked a bit boring with the very white card base and brown ink, so I punched a scalloped border from the center almost to each edge. I then adhered a coordinating strip of cardstock underneath.
These took a little more planning for two reasons. #1 I don't have a variety of colored stamp pads-which would have made the sentiment less time consuming. Instead I pulled out my Spectrum Noir markers and used those to coordinate the sentiment. #2 I had to do a few trial and error cuts from my Cricut for the label. It probably doesn't help that I'm a bit picky and refuse to just go with the first one that fits =) Even then I put these five cards together fairly quickly.
Card dimensions: 4.5" x 6.25"
Mat: 5.5" x 2.5"
Bookmark style strips: 1.25" x 4" and 1.25" x 3.5"
Label (from Gypsy Wanderings): 3.2" x 1.4" (unlock ratio)
You will notice a little extra detail on the floral patterned cards below. I felt that the sentiment I had stamped for the others was a little too mod so I went with a scripty sentiment on these. It looked a bit boring with the very white card base and brown ink, so I punched a scalloped border from the center almost to each edge. I then adhered a coordinating strip of cardstock underneath.
Thanks so much for joining me on my "lose the scrap" journey. My scrap pile feels a bit more under control now and my stash is ready for the next spur of the moment event we are invited to =)
Controlling the Scrap - Version 1.1
My next card was one that utilized narrow strips of three coordinating papers. I went a little less crazy with that one and only did four =) I LOVED how this one turned out and feel like the de-bossed white background added just the finishing touch I needed. My embossing folders had a little too much detail and were too small for the card size I was working with. So I ended up going for a simple quarter inch vertical stripe using my Martha Stewart scoring board. I was even able to use up some of my miscellaneous mini brads that I have had FOREVER! I adhered the strips by only one line of glue at the top so they would "hang" and add a bit of dimension at the bottom.
Card dimensions: 4.5" x 6.25"
Mat: 4.25" x 6"
Strips: .75" wide by 4", 3.75" and 3.5"
Sentiment strips: 4.25" x .75"
Card dimensions: 4.5" x 6.25"
Mat: 4.25" x 6"
Strips: .75" wide by 4", 3.75" and 3.5"
Sentiment strips: 4.25" x .75"
Controlling the Scrap - Version 1.0
My scrap pile from card making was getting wildly out of control. So when I came across a few samples on pinterest I loved that looked like they would put those scraps to good use, I set up a mass production system on my workspace.
My first card was one that used various sized squares and rectangles, including a background mat that could have detail in one corner. I can always use a stash of "generic" cards. So I pre-stamped seven penants of each sentiment (get well, good luck, celebrate and thank you) to have on hand so I can grab them, adhere them, print a pertinent inside and run out the door =) I went a little crazy weeding out any scraps that coordinated and were in the right dimensions. I did TEN takes on that one!
Card dimensions: 4.5" x 6.25"
Mat: 4.25" x 6"
Top rectangle: 2" x 1.5"
Bottom left rectangle: 2" x 4"
Bottom right square: 2" x 2"
Other supplies: scrap ribbon, misc buttons
Mat: 4.25" x 6"
Top rectangle: 2" x 1.5"
Bottom left rectangle: 2" x 4"
Bottom right square: 2" x 2"
Other supplies: scrap ribbon, misc buttons
Monday, June 24, 2013
Flowers to Cheer You!
Image: Thanks! by Mo's Digital Pencil
Supplies:
markers, Spectrum Noir
paper, October Afternoon Woodland Park
doily (behind image), lace and cardstock, misc
Sweet Oklahoma
Image: Sweet Oklahoma by Saturated Canary
Supplies:
markers, Spectrum Noir
paper, gems, ribbon and cardstock, misc
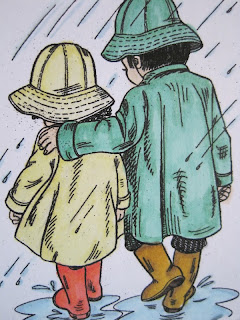
By Your Side
Card size: 4.5" x 6.25"
Image: misc coloring page found online
Supplies:
markers, Spectrum Noir
paper, American Crafts Color Crush
border punch, EK Success
twine and cardstock, misc
Challenges:
Feeling Sketchy Challenge #63
Digi Makeover Challenge #94 - All Tied Up
My Time to Craft Challenge #227 - Spots and Stripes
Monday, August 1, 2011
Rain on Your Parade
Card size: 5” x 5”
Cricut Cartridges: boots, Paisley page 49 cut at 2.5”
doily (scalloped circle), All Occassions Cake Art, page 37 cut at 3”
Supplies: raindrop paper, A Walk in the Park by Echo Park; yellow and fuschia glitter cardstock,
Mango Frost cardstock matstack by DCWV; kraft, black and colored strips, misc; embossing, swiss dots folder by Cuttlebug
Challenges entered: I missed the deadline to enter this but I received the inspiration to do this card from last week's challenge at Color Throwdown.
Subscribe to:
Posts (Atom)


.jpg)
.jpg)


.jpg)
.jpg)
.jpg)
.jpg)


